
Preparing your data
Pasting your data
First upload
Subsequent upload
Data preparation
In preparation for the bulk import, it is important to have all the necessary data organised in a spreadsheet. Please make sure to include all columns in your sheet, even if some data is missing. Leaving a column empty will prevent errors caused by shifting data.
- Column 1: Name (speaker's full name - this is a mandatory field and the import will fail without the name)
- Column 2: Job Title
- Column 3: Company Name
- Column 4: Headshot URL*
- Column 5: Email address
- Column 6: Unique destination URL (optional) PRO only
- Column 7: Groups (optional)
- Column 8: Session (title)
- Column 9: Schedule
- Column 10: Tracks (optional)
*If you are using event management software and have the image URLs ready, you can bulk-add them in one go. Alternatively, you can upload the images afterwards.
You can find the data import template here. Please navigate to the Combined upload tab for this import.
Note: There are different processes for adding Headshot URLs depending on how you receive them, and you can find them all explained in this article.
In this example, the following row would create a speaker called "Mary", a session called "Talk 1", and make Mary a speaker in the session:
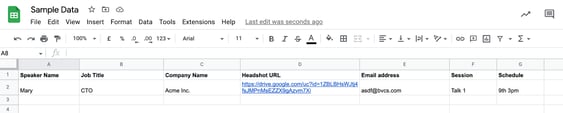
Mary | CTO | Acme Inc. | http://photo | asdf@bvcs.com | Talk 1 | 9th 3pm
Sessions with multiple speakers
If you have a session with multiple speakers, add a row for each speaker, including the session details. As long as the session details are identical, we will create one session and assign both speakers to it, e.g.
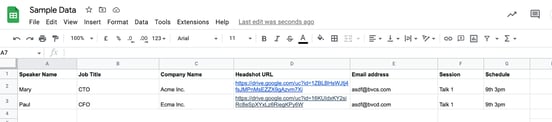
Mary | CTO | Acme Inc. | http://photo_a | bcvd@bvcs.com | Talk 1 | 9th 3pm
Paul | CFO | Ecma Inc. | http://photo_b | asdf@bvcs.com | Talk 1 | 9th 3pm
Speakers on multiple sessions
If a speaker is on multiple sessions, add a row for each session, including the speaker's details. As long as the speaker details are identical, we will create one speaker and add them to each session, e.g.
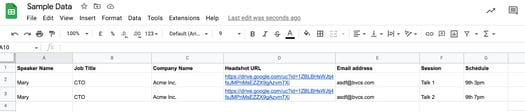
Mary | CTO | Acme Inc. | http://photo_a | asdf@bvcs.com | Talk 1 | 9th 3pm
Mary | CTO | Acme Inc. | http://photo_a | asdf@bvcs.com | Talk 2 | 7th 4pm
Pasting your data
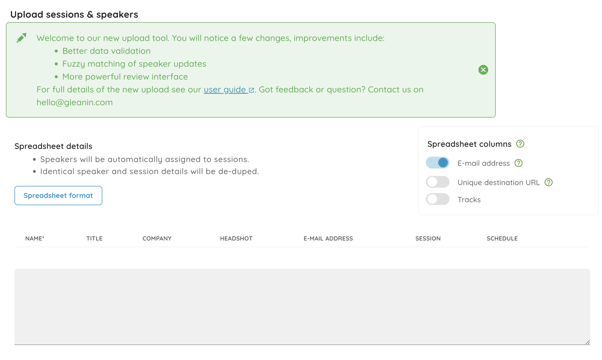
Once your data is ready, you will need to copy and paste it into the import box.
Please DO NOT copy column headings across, as they will be treated as a speaker record. Please note that this is a copy-and-paste process and not an actual upload.
- Go to Event
- Click the Speakers section on the left-hand side menu
- Click on the (+) icon to add data
- Choose the Import speakers & sessions card
- Select the data in your spreadsheet and choose Copy (do not include column headings)
- Go back to the Gleanin import screen and paste the data in the grey box.
Note: If your spreadsheet will contain email addresses, unique URLs or Tracks, please make sure to enable those fields from the right-hand side selection box.
Note: If this is not your first import on this event, please go straight to the Subsequent import section.
First import
Once data is pasted, you will be able to see the Review Speakers screen, which will show you the total number of Speakers, their status - New, Updates, Unchanged and Missing - as well as their Image, Name, Title, Company and so on. If this is your first import, all the records should be New.
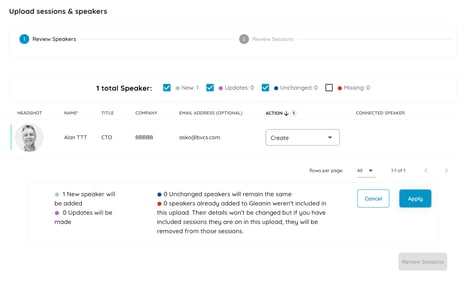
If the Speaker details look correct, leave the action as Create and click on Apply, and if the green tick is present at the end of the row, it means that the record has been created, and you can now proceed to review the session.
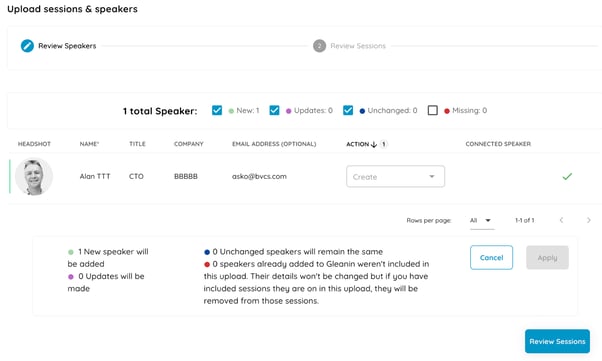
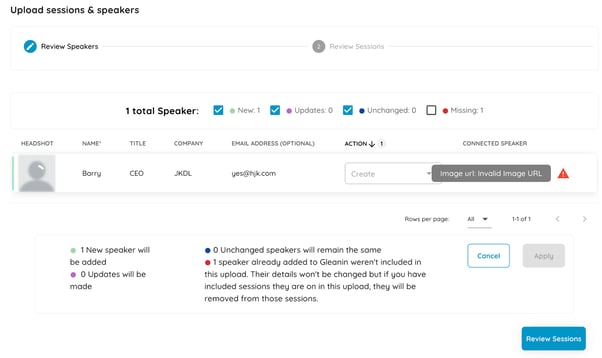
After adding the speaker data, you’ll see a similar review screen with the details of the sessions (title, schedule, new, updated and so on) as well as which speaker is assigned to which session.
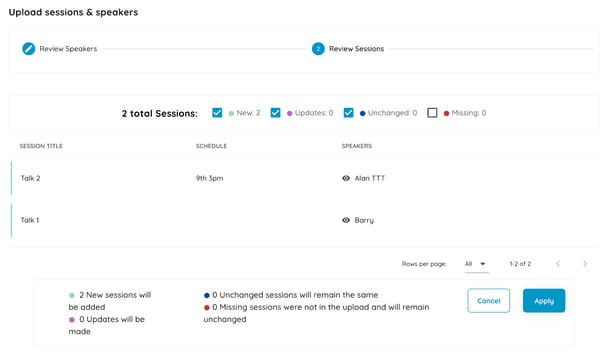
If you are happy with the data and it all looks good, you can just click on Apply and again, if all is good, you will see a green tick, and if there are issues, the red error will appear.
To complete the import, click on Finish.
Subsequent import
If you have completed your first combined import and need to update some records or add additional speakers or sessions, you can do it here as well.
Once data is pasted, you will be able to see the total number of Speakers in this import as well as the number of New, Updates, Unchanged and Missing records.
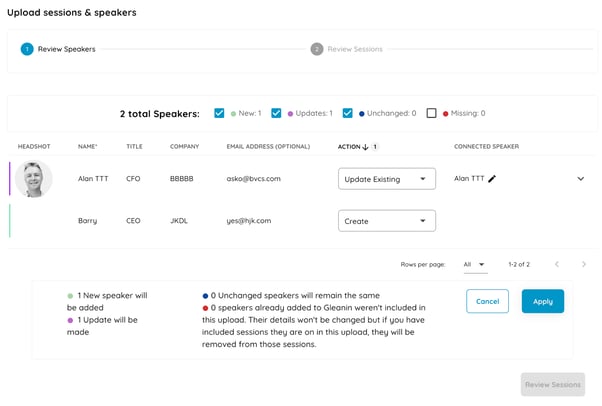
At this stage, you will be required to choose which action you would like the system to perform:
- Update existing - will update the existing speaker record with the change
- Create - will create a brand new record for the speaker (e.g. if you have two speakers called John Smith, there is a possibility of the system suggesting an update, and in this case, you will need to choose to create)
You will see as well which speaker record will be updated in the Connected speaker column.
Unchanged status is for the records that have not been updated, and Missing is the list of records that are on the system but have not been included in the current import.
Note: Missing records will not be processed through the import however, if you have speakers assigned to a session that is included in the import, you will need to make sure that you include them in the spreadsheet, as otherwise, they will be unassigned from that session. If they are assigned to a session that is not in the import, no changes will be made.
When you are happy with the data and the actions that will be taken, click on Apply, and as with the first import, if all is good, you will see green ticks, and if there are errors, they will be flagged, and if you are still experiencing issues after rectifying the highlighted details, please message us at hello@gleanin.com.
On the sessions review screen, you will be able to see the total number of sessions as well as the number of New, Updates, Unchanged and Missing.
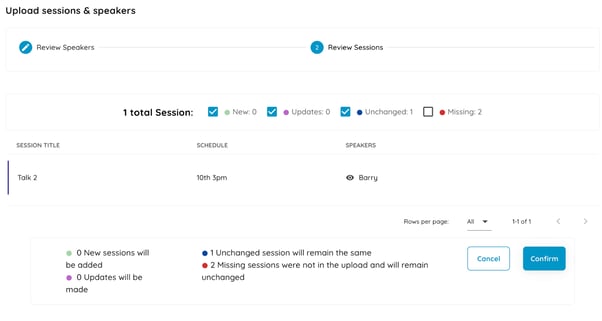
Note: On any subsequent upload, we will never update an existing session. We do not identify the updates as the same session can be run at different times, and different sessions can run at the same time.
For Sessions, Missing records will remain as they are.